Window condensation is one of those problems that looks minor and turns serious fast. This guide covers what causes it, why the location of the condensation matters more than the condensation itself, what damage it causes if you leave it alone, and the practical steps that actually reduce it. It also covers the one scenario where no amount of wiping or ventilating will help and what to do instead.
What Causes Condensation on Windows
Condensation forms when warm, moist air comes into contact with a surface that’s cooler than the air’s dew point. The dew point is simply the temperature at which water vapor in the air turns back into liquid. When your window glass is colder than that threshold, water droplets form on the surface.
Every home produces moisture constantly. Cooking, showering, breathing, houseplants, and doing laundry all add water vapor to your indoor air. When that moisture-laden air hits cold glass, condensation appears.
In Southern California, the condensation conversation is different from the cold-climate framing most guides use. LA homeowners deal with two distinct scenarios:
Marine layer mornings. Coastal areas from Malibu to Manhattan Beach experience high outdoor humidity during marine layer season, typically May through September. On cool mornings when indoor temperatures are warmer than the outside air, condensation forms on glass that has been cooled overnight.
Summer AC season. When you run air conditioning, your glass gets cold. Warm, humid outdoor air hitting that cold glass produces condensation on the exterior. This is the opposite of what cold-climate guides describe, but it’s the most common complaint from LA homeowners during summer months.
Understanding which scenario you’re dealing with is the first step to knowing what to do about it.
The Three Types of Window Condensation
Where the condensation forms tells you everything about whether you have a problem and how serious it is.
| Location | Cause | Action Required |
| Inside surface of glass | High indoor humidity | Reduce humidity, improve ventilation |
| Outside surface of glass | Dew from atmospheric conditions | None. Sign of an efficient window. |
| Between the panes | Seal failure | Window repair or replacement |
Condensation on the Inside of Your Windows
Interior condensation forms when warm, humid indoor air contacts the cooler surface of the glass. You’ll see it on the room-facing side of the pane. It can be wiped away. In most cases, it points to a humidity issue inside your home rather than a problem with the window itself.
Run your finger through the condensation. If it wipes clean and leaves a trail, it’s on the interior surface. That’s your confirmation that the cause is indoor humidity, and the fixes below apply directly.
Condensation on the Outside of Your Windows
Exterior condensation is dew. It forms when the outside surface of the glass is cooler than the outdoor dew point, exactly the same way dew forms on grass on a cool morning. It’s most common along the LA coast during marine layer season and in inland areas on cool mornings following warm days.
Exterior condensation is a sign that your window is insulating well. The outer pane is thoroughly isolated from the heat inside, which means the glass gets cold enough to collect dew from outside air. Leave it alone. The sun takes care of it.
Condensation Between the Panes
This is the type that matters most. If you see fogging, streaking, or moisture trapped between the two panes of a double-pane window, the seal has failed. The insulating gas, typically argon, has escaped. The thermal barrier is gone.
This type of condensation cannot be wiped away. It’s inside the sealed unit. No ventilation change, no dehumidifier, and no cleaning product will fix it. The window is no longer performing as designed, and replacement is the right call.
How to Reduce Condensation on the Inside of Your Windows
Interior condensation is caused by excess indoor humidity. These fixes target the source directly.
Improve Ventilation
Getting moist air out of your home is the most direct solution. The more moisture you exhaust before it reaches your windows, the less condensation forms.
- Run extractor fans in the kitchen while cooking and leave them on for at least 10 to 15 minutes after you finish
- Run bathroom fans during showers and until the mirror clears completely
- Open windows for short periods during the day, even in cool weather, to exchange moist indoor air for drier outdoor air
- If your windows have trickle vents, small openings built into the frame, keep them open rather than closed
- Keep interior doors open when possible to prevent moisture from concentrating in one room
In newly built or recently renovated homes, construction moisture in materials can elevate indoor humidity for months. Consistent ventilation during this period makes a meaningful difference.
Use a Dehumidifier
A dehumidifier pulls moisture directly from the air, which stops condensation before it reaches your windows.
Portable dehumidifiers work well for individual rooms and problem areas. They’re the right choice if condensation concentrates in specific rooms like bedrooms or kitchens.
Whole-home dehumidifiers integrate with your HVAC system and manage humidity across the entire house. For homes in coastal LA where marine layer humidity is a consistent seasonal issue, a whole-home unit is a more lasting solution than managing room by room.
The target indoor humidity level for most homes is between 30 and 50 percent. A hygrometer, an inexpensive tool available at most hardware stores, tells you exactly where your home sits. If you’re consistently above 55 percent, condensation on windows is one of the milder symptoms of that problem.
Wipe Windows Down Daily During High-Humidity Periods
Even with good ventilation and a dehumidifier, some condensation may form overnight during marine layer season. Wiping windows each morning prevents water from sitting on frames and sills long enough to cause damage.
A microfibre cloth absorbs moisture without streaking. A window vacuum speeds up the process across multiple windows and is worth the investment if morning condensation is a regular occurrence in your home.
Manage Indoor Moisture Sources
Several common household activities add significant moisture to indoor air. Small changes reduce the total humidity load considerably:
- Cover pots and pans when cooking
- Dry clothes outdoors or in a properly vented dryer rather than on indoor drying racks
- Vent tumble dryers to the outside, or use a condensing dryer that collects water in a tank if external venting isn’t possible
- Keep firewood outside rather than storing it indoors
- If you have many houseplants in a single room with persistent condensation, spread them across the home or move some outdoors
What Happens If You Leave Window Condensation Untreated
Surface condensation that appears and dries each day is manageable. Persistent condensation that sits on frames and sills for extended periods causes real damage, and it follows a predictable progression.
Stage 1: Cosmetic damage. Paint peels on window frames and surrounding walls. Sills stain and discolor. This typically appears within weeks of persistent untreated condensation.
Stage 2: Frame deterioration. Wood frames begin to soften and rot. uPVC seals dry out from repeated moisture and UV cycles, leading to cracking. Aluminum frames in coastal areas show corrosion at joints and hardware points.
Stage 3: Mould growth. Black mould forms on frames, sills, and nearby walls. Beyond being unsightly, mould affects indoor air quality and can trigger respiratory issues and allergy symptoms in sensitive occupants.
Stage 4: Structural spread. Moisture works into the wall cavity surrounding the window frame. Damp patches appear on interior walls, insulation degrades, and what started as a window problem becomes a structural repair.
The time between Stage 1 and Stage 4 depends on climate, window material, and how often the condensation forms. In LA’s coastal zones where morning condensation is frequent during marine layer season, that timeline can be shorter than most homeowners expect.
Window Upgrades That Reduce Condensation When Habit Changes Aren’t Enough
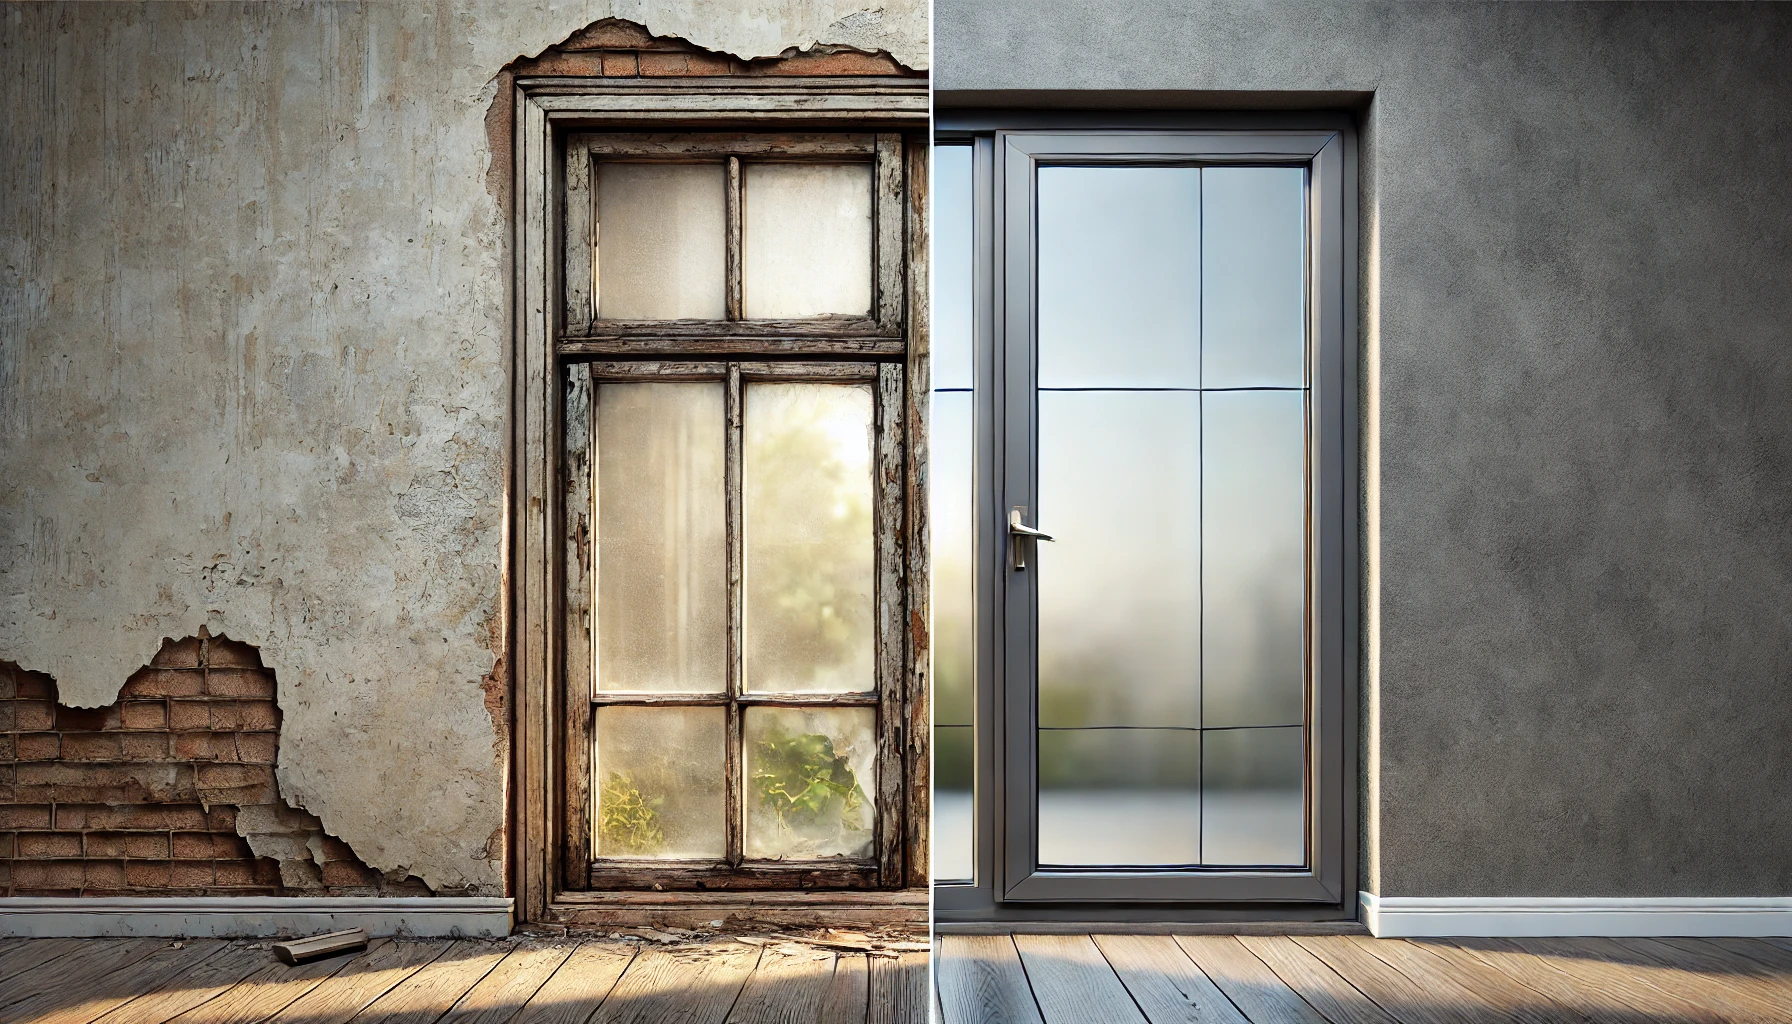
If you’ve addressed ventilation and humidity and condensation persists, the window itself may be part of the problem. Older or lower-quality windows run colder on the interior surface, which means the dew point is reached more easily and condensation forms more frequently regardless of your indoor humidity level.
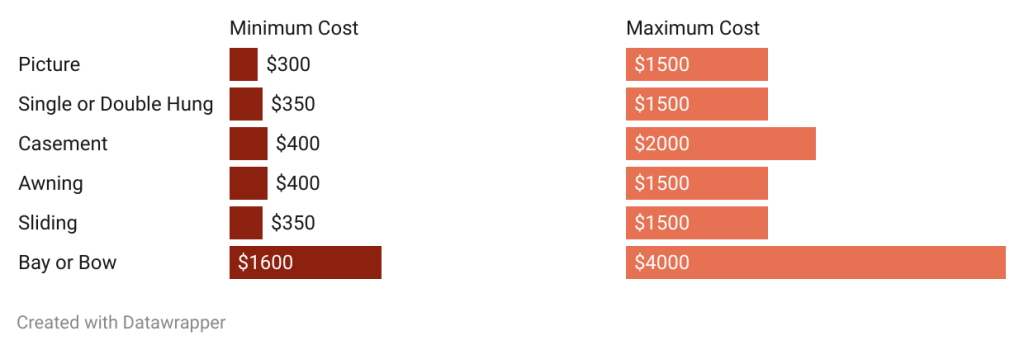
Single-pane windows are the most condensation-prone configuration available. Without an insulating air gap between the glass and the room, the interior glass surface gets very cold very quickly. If your home still has single-pane windows, upgrading to dual-pane is the single most effective change you can make for condensation reduction.
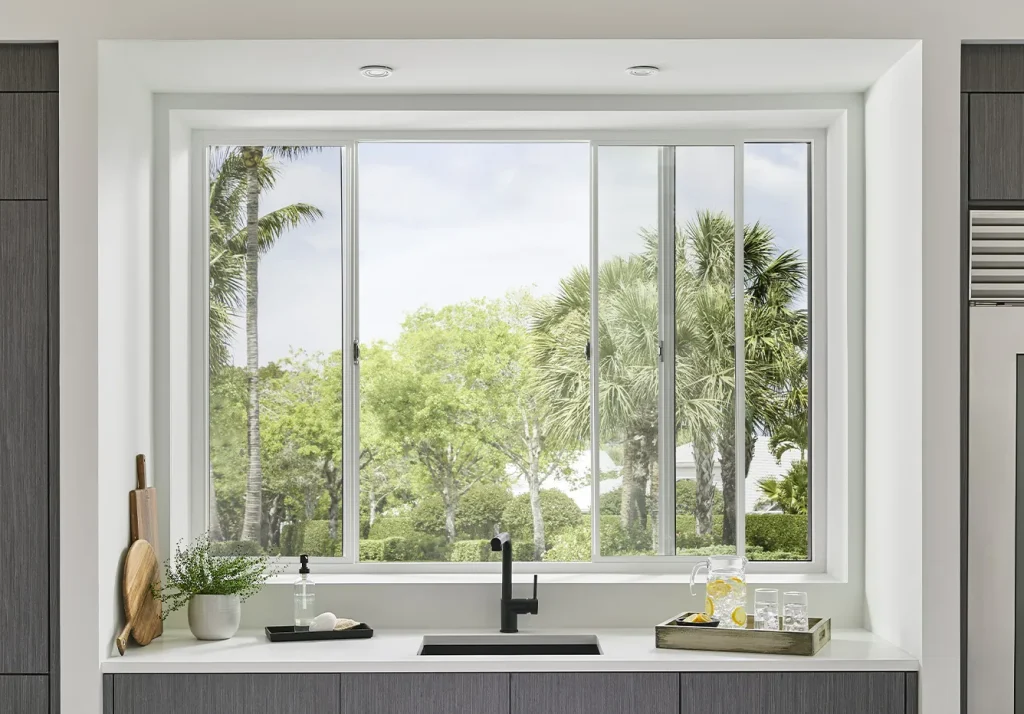
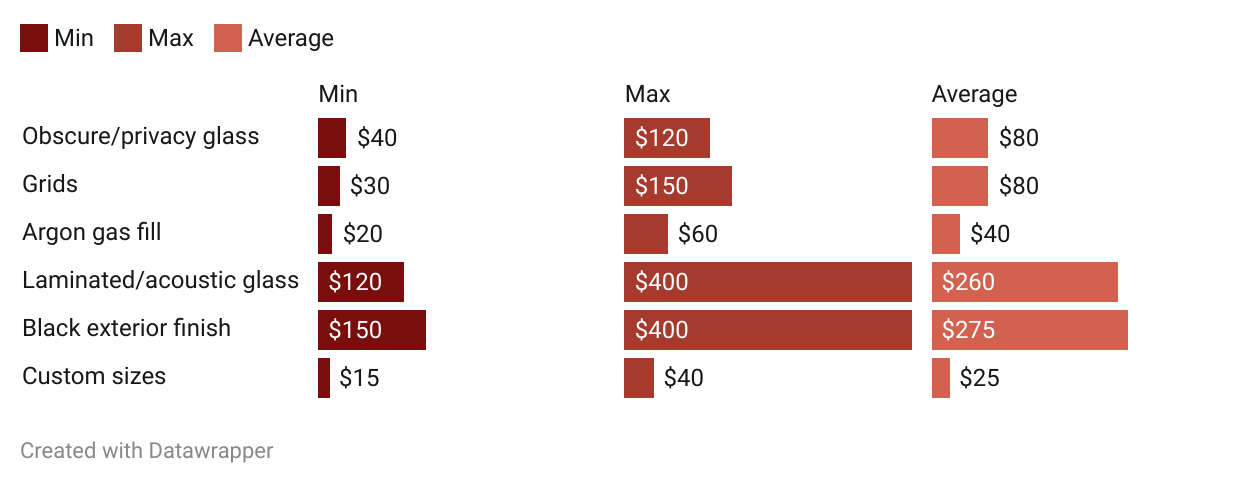
Dual-pane windows with Low-E glass keep the interior pane warmer by reflecting heat back into the room. A warmer interior glass surface is less likely to reach the dew point, which means less condensation forms even at the same indoor humidity level. In California, any permitted window replacement must meet Title 24 energy standards, which require dual-pane Low-E glass as a baseline. That requirement exists precisely because this glass configuration performs better thermally, and reduced condensation is one of the direct benefits.
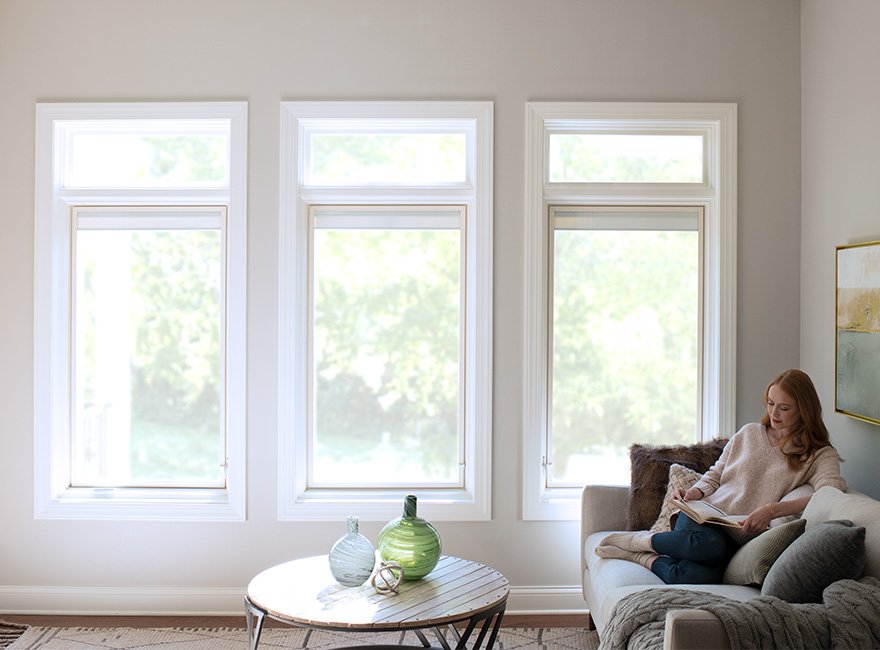
Thermally broken aluminum frames address a specific problem: standard aluminum conducts cold from the outside to the inside of the frame, which creates a cold perimeter around your glass that condenses moisture independently of the glass itself. A thermally broken frame inserts a non-conductive barrier that stops that transfer. If you’re seeing condensation specifically around the frame edges rather than across the glass, this is often the cause.
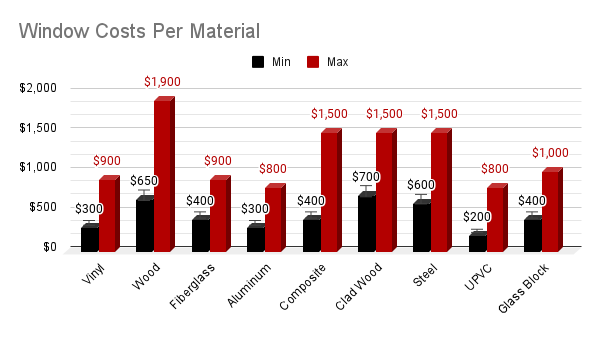
Frame material also matters. Vinyl and fiberglass frames are naturally less conductive than aluminum, which means the frame itself runs warmer and contributes less to condensation formation. For coastal LA homes where condensation is a persistent seasonal issue, fiberglass is the most practical frame material across most applications.
Condensation Between the Panes: When the Window Needs Replacing
Condensation between the glass panes of a double-pane window is a different problem from everything covered above. It cannot be fixed by changing your habits, improving ventilation, or running a dehumidifier. The seal that keeps the insulating gas inside the unit has failed, and once that happens there is no repair that restores the window’s performance.
Here’s what seal failure means for your home:
- The argon or krypton gas has escaped, eliminating the thermal barrier between the panes
- The window’s U-factor and SHGC ratings are now significantly worse than when it was installed
- Your heating and cooling system works harder to compensate for the lost insulation
- The fogging will worsen over time and cannot be cleaned from the inside
Some contractors offer a “defogging” service that drills small holes in the glass to remove the trapped moisture temporarily. This clears the view but does not restore the seal or the window’s energy performance. It’s a short-term fix that delays the inevitable.
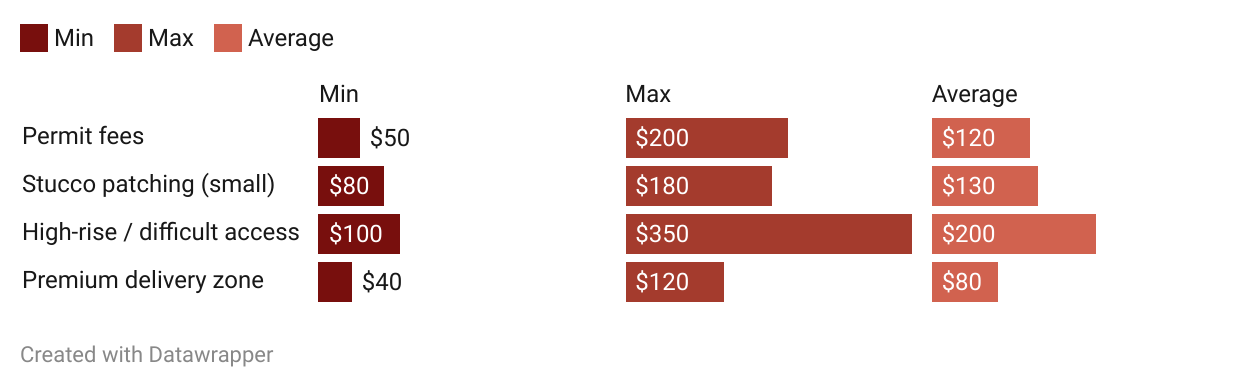
The right solution is replacement. When specifying a replacement window, look for NFRC-certified ratings that confirm the U-factor and SHGC meet California’s Title 24 requirements. Any window installed under a permit in most Southern California climate zones must achieve a maximum U-factor of 0.30 and SHGC of 0.23 or lower. A window that meets these standards will perform significantly better against condensation than the unit it replaces.
At Fusion Windows and Doors, we carry Milgard, Andersen, Marvin, Fleetwood, and other brands that meet Title 24 requirements across all Los Angeles climate zones. If condensation between the panes is what brought you here, our door and window installation services cover the full replacement process from measurement through installation.
Frequently Asked Questions About Window Condensation
Is All Window Condensation a Sign of a Problem?
No. Condensation on the outside surface of your windows is actually a sign of good thermal performance. It means the outer pane is well insulated from indoor heat, which causes it to cool enough overnight to collect dew. Condensation on the inside surface points to high indoor humidity, which is manageable with ventilation and a dehumidifier. Only condensation between the panes signals a window failure that requires replacement.
What Indoor Humidity Level Should I Aim For?
The recommended range for most homes is 30 to 50 percent relative humidity. At levels above 55 percent, condensation on windows becomes much more frequent, and the risk of mould growth increases. A hygrometer measures your home’s humidity accurately and costs around $15 to $30 at most hardware stores. Check readings in the morning before ventilating, since that’s when indoor humidity peaks.
Why Do My Windows Get Condensation in Summer When the AC Is Running?
In Southern California, summer condensation is usually exterior condensation, not interior. Your air conditioner cools the glass, and warm humid outdoor air hitting that cold surface forms dew on the outside pane. This is normal and harmless. If condensation is forming on the inside of your windows with the AC running, your system may be over-cooling the glass or your indoor humidity is higher than it should be. Running bathroom and kitchen fans consistently and checking your HVAC filter helps in both cases.
Can I Fix Condensation Between the Panes Myself?
No. Condensation between the panes means the sealed unit has failed. The moisture is trapped inside and cannot be wiped away from either surface. DIY defogging kits and drilled-hole methods clear the view temporarily but do not restore the seal or the window’s insulating performance. The only solution that restores full function is replacing the glass unit or the entire window, depending on the frame’s age and condition.
How Long Do Window Seals Typically Last in Southern California?
Most quality dual-pane window seals are rated for 20 to 25 years under normal conditions. In Southern California, UV intensity and thermal cycling, the repeated expansion and contraction of frames and seals as temperatures swing between cool nights and warm days, can shorten that timeline. Coastal properties face the additional factor of salt air degrading seals at joints and edges. Regular inspection of your windows for early fogging between panes lets you plan replacement before the damage spreads to surrounding frames and walls.
At Fusion Windows and Doors, we’ve been installing replacement windows across Los Angeles for over 20 years. If condensation between the panes has you questioning whether your windows are still doing their job, get a free quote and we’ll assess your windows in person and give you an honest recommendation on whether repair or replacement makes sense for your situation.